Why then, if the studies show that earlier administration of CPR results in better outcomes, is bystander CPR administered less than half the time? It could be related to bystanders not having prior training. They could be fearful of causing more harm if CPR is performed incorrectly. They could be sitting on the sideline waiting for someone else. They could be concerned about spreading or receiving an illness as a result of performing CPR. Or, they could be concerned about the false idea of having mouth-to-mouth contact with a stranger; the current recommendations for layperson CPR are chest compressions only. Whatever the reason(s)—from self-doubt to being grossed out—it is my opinion that we need to help educate bystanders on how to perform CPR in a pinch, should the situation arise.
The more I thought about it, the more I wondered if there were apps designed for laypeople, non-healthcare professionals, that could help train them by virtually placing them in a situation as a potential bystander. I specifically looked at apps that provided a virtual reality (VR) experience. These apps do require some form of device to place your phone into to get the full experience. They can range from a Google Cardboard VR display to any of the multiple plastic devices you can find on Amazon. I used the View-Master VR Headset to review the following five apps.
CPR Training
CPR Training, created by Warp Industries BV, is a free app that requires the user to wear a VR headset. After a brief instructional tutorial, you are “warped” into a scenario at a mall where you witness an elderly man collapse due to cardiac arrest. You are then tasked to select the correct option from a list of at most four options based on the situation.
The application does an excellent job of building the scenario and allows you to look around in all directions. Despite the excellent VR, the overall experience was rather clunky. Scenarios would end suddenly without explanation, and there is no education to reinforce or correct mistakes.
Virtual CPR
VirtualCPR does not require a VR headset. Instead, the app, created by Virtualware 2007, places you in a scenario of a virtual body that can perform basic life support. It appears that you can log in if you have an account, but it was not specifically spelled out, nor was there a readily seen help option. I could access the tutorial, which allows you to enter the simulation. The interface was cluttered and didn’t identify labels for the given options. The tutorial took you through step-by-step as to what needed to be performed on the simulator.
It gamified the basic life support procedures and scored you on how well your compressions were, calculated by percent ineffective compressions versus percent effective compressions, response time. It was quite basic, and I was rather disappointed I couldn't get into the actual app to try the scenarios.
There were few customizations during the scenario you could select. For example, if your compressions were ineffective, you could turn on the metronome that plays The Bee Gees’ hit song “Staying Alive” to sync your compressions to the rhythm. It was OK, but I still felt there could be an app that provided a better experience for the layperson.
VR Clinic
The app VR Clinic, created by Mad development Co, gave me more of what I was looking for. Like the others, this app is also free. Once you download the app on your phone, you can choose which scenario you want: adult, child, or infant. The scenarios include one-person rescue, two-person rescue, and choking.
The application educates you by having you watch a virtual movie/scenario first. You then move onto the “testing” option, which lets you pick the appropriate step from floating options based on the current situation. It then scores you and reviews any mistakes or missteps.
You are also given the option to use the app with or without a VR helmet. The VR helmet offers an immersive experience. You can look all around the setting you are in. The situations tend to be more of a choose your own adventure but could be a useful option to prepare laypeople. It is the only app I used that offered scenarios for children or infants.
Virtual Rescue Hero and Virtual Rescue Mobile
These two apps are variations of each other. Both were created by VR Lab BV for Zoll. Both require a VR helmet, and they take you through a scenario of being outside an office building when someone collapses. Where the two apps diverge is the approach to how they present the scenario:
The Virtual Rescue Hero presents the scenario as a virtual movie. You float over the bystander who is performing compressions and utilizing the Zoll automated external defibrillator (AED). The AED provides you a metronome to keep your compressions in sync. It also tells you if your compressions are ineffective and need to push harder.
The Virtual Rescue Mobile puts you in the shoes of the bystander. You can actually place your hands on a sofa cushion as you look down on the virtual patient and perform chest compressions. As you are performing the chest compressions, you can actually see the chest rise and fall on the patient.
Granted these apps are an advertisement for Zoll AEDs, they provide a good sense of immersion and interaction I would expect the average bystander to have in real-life.
Many of the apps were good in terms of providing basic information and placing bystanders in clinical scenarios to recognize, activate, and begin the chain of survival. I feel the Zoll apps and the VR Clinic would be a good place for laypeople to start. These apps can help build confidence so if they were in that scenario, they could potentially change an outcome of out-of-hospital cardiac arrest.
These apps are still not a replacement for basic CPR certification but hopefully they would encourage laypeople to take action if the opportunity presents itself. Something these apps could do better with regards to bystander CPR is to be more current with the AHA’s recommendations.
With AEDs more ubiquitous in public settings, I would hope that these apps could empower laypeople to take it upon themselves to administer CPR and save a life instead of watching helplessly and waiting for someone else. Time is muscle!
15% Off Medical Practice Supplies
VIEW ALL
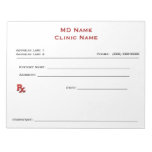
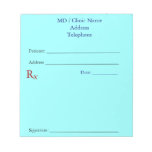
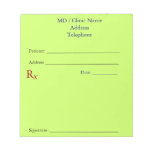
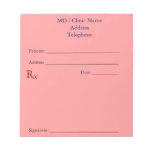
 Manual Prescription Pad (Large - Yellow)
 Manual Prescription Pad (Large - Pink)
 Manual Prescription Pads (Bright Orange)
 Manual Prescription Pads (Light Pink)
 Manual Prescription Pads (Light Yellow)
 Manual Prescription Pad (Large - Blue)
 In a perfect world, these clinical tools would be a standard electronic health record (EHR) tool to provide meaningful use to both providers and the patients they are caring for. But alas, they are not. Next to my stethoscope, my smartphone is the most important tool I carry with me. When I pick up my smartphone to use a medical calculator tool, my go-to app is MDCalc.
 As its name suggests, Favorites are where you can quickly reference calculators that you have saved using the star icon. Recent shows the last 10 calculators you used. My Specialty is determined when you register and select your practice specialty. Once selected, those calculators are pre-populated. And then there is All, which gives you access to the entire library regardless of specialty.
 MDCalc is one of my essential apps, and I tend to use it frequently during an Emergency Department shift. This app is quick and responsive, and the interface is uncluttered. I find the most useful option to be the Next Steps tab that details an action plan. I have not used any other calculator with anything remotely comparable. Next Steps can be a lifesaver, no pun intended.